08 August 2015

Camera Trap Photo Tricks 102

Cropping, one of the biggest enigmas of photography.

Cropping can have a huge effect on your photographs. It can either make or break a photograph. I have to admit that I'm definitely not an expert at cropping or framing pictures. Still, I don't let that prevent me from at least trying to find a good crop for the photos I upload to this blog.

Form my (limited) experience the following concepts come to mind when I think about cropping a camera trap photo:
  • What aspect ration will work best?
  • Will landscape or portrait work best?
  • What should be the focus point of the image?
  • How large do I want the animal to be in the final crop?
  • How should I crop the photo to "tell a story"?
  • What are the limiting factor? (For example resolution, border, obstructions, etc.)
There is a lot of information readily available that deals with cropping and framing in general, and I don't want to repeat it here. I would rather try to illustrate some of the common issues I encounter when cropping camera trap photos.

There is a bit of a love hate relationship between cropping and camera trapping. On the one hand you have very little control over the final image, especially where the animal will be in the photograph, as a result the initial (original) crop is usually rather bad. On the other hand you can use cropping to try and alleviate this problem by making a smaller but better crop of the original image.

However in some situations no amount of cropping can save the image...

[Original] Steenbok (Steenbok - Raphicerus campestris) at Koeberg Nature Reserve

Sometimes a little cropping can still make a meaningful improvement. For example, even thought the full animal isn't in the crop you might still be able to do the background scenery more justice with a good crop.

With some photographs the animal is simply too far away. In these situations cropping can be a very useful tool to bring the photograph to life.


[Original] Caracal (Rooikat - Caracal caracal) at Koeberg Nature Reserve

This slightly closer landscape crop still contains the essence of the original image

I think this much closer landscape crop starts to lose the essence of the original image

Sometimes it is worth playing around with the cropping orientation (landscape vs portrait) or even a square crop.

Square crops usually don't look very good, but can be practical, especially for small images

An important aspect of cropping is "telling a story". A good crop can really help to tell the story of the photograph. This is why the portrait crop (below) is my favourite. It tells the story of this Caracal walking across the expansive barren white dunes at Koeberg Nature Reserve.

My favourite crop, striking a balance between the animal, environment and atmosphere/story

Another size related issue is that the animal itself can be just too small.


[Original] Four-Striped Grass Mouse (Streepmuis - Rhabdomys pumilio) at Tygerberg Nature Reserve

An extremely close crop of the mouse

The image above illustrates another big problem frequently encountered while cropping: pixelation. When the crop becomes too small the pixels become more and more noticeable.

Or the reverse, the animal is just too big or close to the camera. In these situations there isn't much you can do to improve the image.

[Original] Bushpig (Bosvark - Potamochoerus larvatus) at Woody Cape section of Addo Elephant National Park

Another useful feature of cropping is that it can help when you need to rotate a photograph.

[Original] Blue Duiker (Blouduiker - Philantomba monticola) at Woody Cape

The rotated and cropped image

Cropping is often used to place the subject in the center of the image and can get rid of unnecessary, non-essential or undesirable parts of the image.
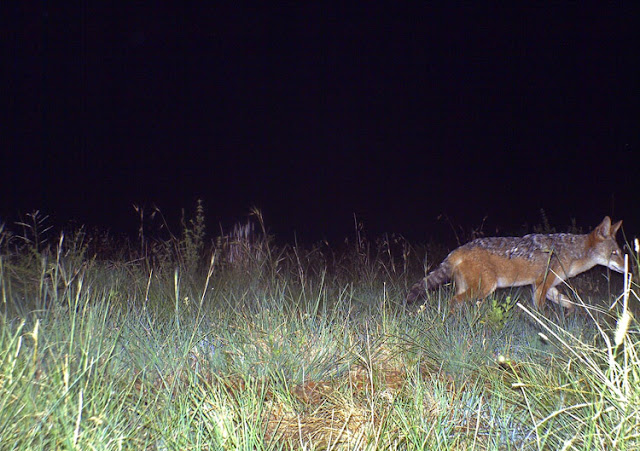
[Original] Black-Backed Jackal (Rooijakkals - Canis mesomelas) at Suikerbosrand Nature Reserve

Not perfect, but a potentially better crop

The photograph above illustrates another aspect of cropping very well, a too tight crop. The image would have been a lot beter if there was more space in front of the Jackal. When possible try to leave the animal enough space to interact with it's environment. This is closely related to "telling a story".

Instead of always centering on the animal's face, it might be better to allow some space to "follow the animal's gaze".

[Original] Grey/Common Duiker (Duiker - Sylvicapra grimmia) at Koeberg Nature Reserve

Not all crops are better, and I actually think the original (above) looks better than the crop below.

This crop didn't come out very well

Sometimes one is lucky and the original photograph "contains" a good crop. For example, the image below can be cropped to a more pleasing aspect ration and the focal point can be moved slightly to the Jackal's face, leaving enough space ahead of the animal to get the feeling of movement.

[Original] Black-Backed Jackal at Suikerbosrand

I feel that the final crop tells the story better than the original

Cropping is a vast area and I've only managed to scratch the surface of it, nonetheless I hope you will look with new eyes at the world of cropping.

[Original] Common Duiker at Koeberg Nature Reserve
"Oh oh, I'm being framed!"

20 June 2015

Porcupines Feetures

The Cape Porcupine is the largest rodent in this part of the world, and as a result also the largest rodent photographed earlier this year on the small farm near Paarl.

Porcupine (Ystervark - Hystrix africaeaustralis) amongst some denser vegetation

Porcupines can still, in this day and age, be found living close to human settlements in the more rural areas and along the urban edge. Given that there is enough natural cover, food and a place for them to rest underground during the day they can live happy lives.

The most intriguing camera trap photo I got was of this individual with a peculiar injury.

Porcupine with a strange injury on its right hip

I'm not sure what might have caused the injury. Maybe from fighting, or maybe it got injured by some of the old farm equipment? The property is also on the corner of a highway and a large road, but I think any collision with a vehicle would have been fatal. Porcupines are common victims of motor accidents, the scene of the crime usually marked by a plethora of broken quills scattered across the road. I'm sure that most of the casualties can be attributed to their nocturnal habits and tendency to not run away when threatened but instead rely on their formidable armour the deter attackers.

This photograph also nicely illustrates two interesting characteristics of Porcupines: their quills and feet.

Porcupines are covered by harsh think hair and spiky quills, but not all quills are the same. The quills have specialised into a range of spikes, from small short spikes to long thick strong spikes used for defence. The long thin wires on their heads give them that characteristic sleek hairstyle. They also have remarkable whiskers.

The other feature that can be seen very well in the photograph is the feet. They have a very human-like quality. This is because both primates (humans) and rodents (Porcupines) use plantigrade locomotion to get around. It can be difficult to see and appreciate the similarity in smaller rodents, but since Porcupines can grow over 80 cm long and weigh up to 30 kg it makes it easier to see the resemblance.

To wrap things up here is a video of the family a few weeks later visiting one of the small ponds at the farm.

Video: Porcupines at the pond

29 May 2015

The Data Pond

I've been camera trapping on a small farm just outside the town of Paarl (which is situated very close to Cape Town) from January to April this year.

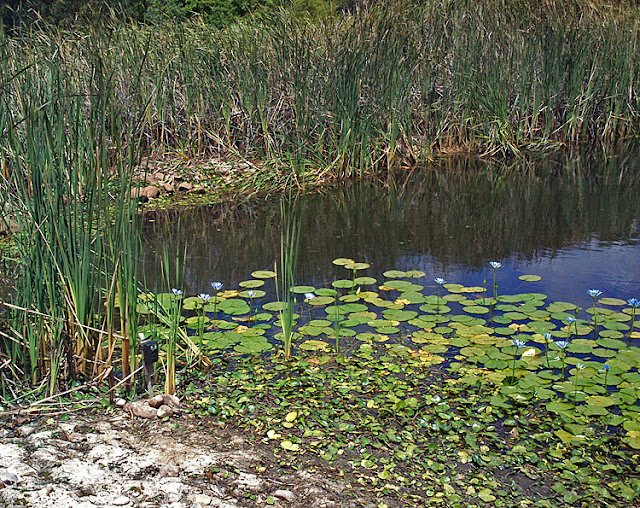
Bushnell camera trap at the farm's pond

The camera trap at the small farm pond in the photograph above got some interesting results. The initial camera trap positioning was fairly good and I got a Cape Grysbok and Water Mongoose early on.

Cape Grysbok (Kaapse Grysbok - Raphicerus melanotis) getting a drink

However the mongoose decided that my camera placement could do with some adjustment.

Marsh Mongoose (Kommetjiegatmuishond - Atilax paludinosus) freelance camera trap adjuster

After the adjustment I didn't get a decent photograph of any more mammals, but the camera did focus on a small part of the bank and as a result captured many photographs of the resident water birds.

Black-Crowned Night Heron (Gewone Nagreier - Nycticorax nycticorax) sneaking past the camera

Many of the photographs had multiple species visible at once and as a result it took a while to capture the data. In the end I recorded 325 observations over the 3 week period. This is a sizable amount, and I was curious whether the reporting feature I recently added to WildLog might show some interesting trends.

First up is a chart showing the number of observations recorded compared to the duration of the observation (using 30 second intervals). The shape of the curve is fairly standard, with a very large amount of very short observations followed by a sharp drop. What I find interesting is that there is a high number of observations extending past 30 seconds and into the 3-4 minute mark. Clearly these water birds at the pond spend more time feeding in a small area, before moving on, compared to more conventional camera trap subjects and locations.

 
Another benefit of getting such a high number of observations over suck a short period of time is that you can compare the exact time the observations were made too each other, without having to worry too much about the change in season, sunrise, etc. In this case the data shows a huge spike in activity between 5:30am and 8:30am.


Looking at the bar chart that maps each time to a relative time of day category (based on season and sunrise) the same trend is visible. Sunrise and early morning is clearly the peek of activity at the pond.

 
The last chart I want to put in this blog post is one showing the number of observations recorded during each 24 hour period. Looking at the chart it seems like there might be a possible pattern: days with high activity are usually followed by days of low activity. I'm assuming this can be attributed to the birds' feeding behaviour. These species will be mostly feeding on plants, small animals, insect, invertebrates, etc. and it makes sense to allow the prey species some time to recover before feeding again in the same area.


Another interesting observation is that the birds would often feed together. There are many benefits to doing so, ranging from better protection from predators, to the fact that the disturbance caused by one bird feeding might make things easier for the other bird to catch its prey. The different species usually don't compete directly with each other for the same food.

The animated GIF below is somewhat on the large size (about 8 MB), but I'm going to try and include it in this blog post because I think it helps to illustrate life at the pond very well. The following species can be seen in the clip:
  • Yellow-Billed Duck (Geelbekeend - Anas undulata)
  • Common Moorhen (Grootwaterhoender - Gallinula chloropus)
  • Cape Wagtail (Gewone Kwikkie - Motacilla capensis)
  • Cape Weaver (Kaapse Wewer - Ploceus capensis)
  • Black Crake (Swartriethaan - Amaurornis flavirostra)
  • Little Grebe (Kleindobbertjie - Tachybaptus ruficollis)

About 20 minutes of bird activity at the pond condensed into a few seconds

For those wondering, in total this set recorded 19 species. The 6 species mentioned above was by far the most numerous visitors.

During my camera trapping excursions I came across a dead Yellow-Billed Duck and was able to get some close-up photos.

Close-up of the wings of a dead Yellow-Billed Duck

The Yellow-Billed Duck is a type of Dabbling Duck and has the grooves along the edge of the bill to help with feeding.

The duck's bill

I'm really enjoying the new reporting tools in WildLog. Even though these findings are nothing strange or ground-breaking I still learn a lot (first hand) from them. It is fun to see the data take shape after going through the hard work of capturing it.

28 March 2015

December Highlights

I finally finished WildLog v4.2 earlier this week and can now catch up on my backlog of camera trap photos I haven't captured yet. If you are interested you can find out more about the program over here, or download it from over here.

December a year back I tried my hand at camera trapping a Golden Mole at our family holiday home near the Woody Cape, you can find the old blog post over here. This past December I tried it again, but this time with a new camera trap.

Video: Hottentot Golden Mole (Hottentot Gouemol - Amblysomus hottentotus)

I recently got a new Bushnell NatureView HD Max to replace my old Bushnell Trophy Cam from 2009 which is starting to act up. The new Bushnell comes with an interesting feature: you can attach a close-up lens to the camera to enable it to take sharper images at close range.

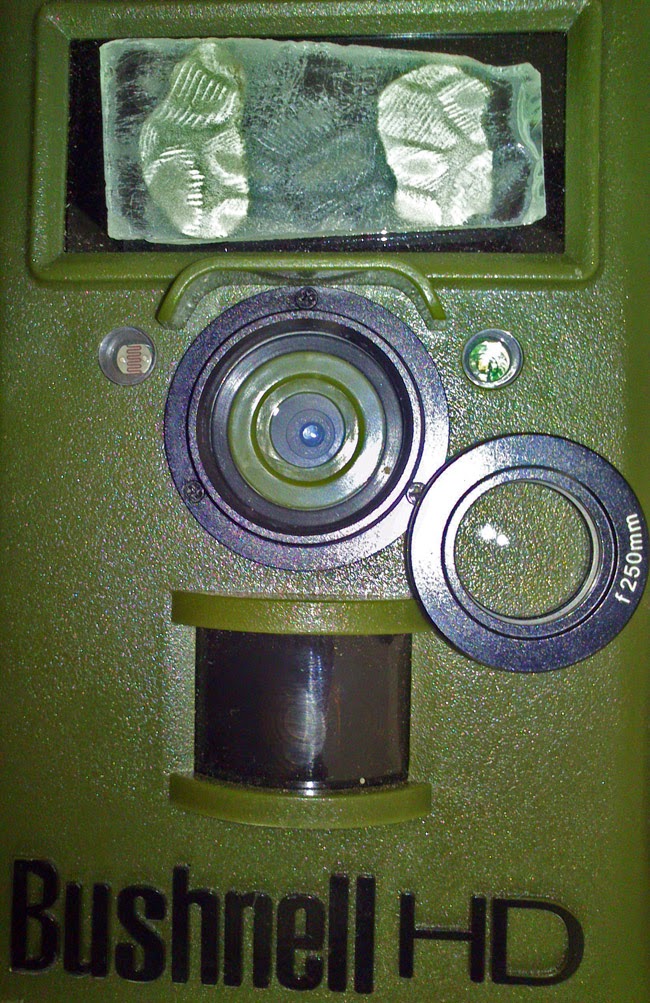
Bushnell NatureView HD Max with clos-up lens

The camera is still far from perfect and nowhere near the level of automatic focus seen in digital and phone cameras these days, but it is an interesting feature and does make a difference. I haven't had time to play around with it much, but it seems to work decently well.

I still think that using the video setting gives you the best chance to get a decent view of these small critters. The new Bushnell can be configured to take some photographs and then follow up with a video. Below is the best of the photos I managed to get using this configuration.

Hottentot Golden Mole too close to the camera trap

I have adjusted the brightness and contrast of the photos and videos to improve the image quality. The original images where much brighter.

I own another Bushnell Trophy Cam (a 2010 model I think) which I used during the same trip to scout for some Shrew action.

Camera trap ready for some Shrew action underneath the overhanging rocks on the beach at Cannon Rocks

Below is a video clip from that camera, you can see that the quality of the new NatureView is much better.

Video: Unidentified Shrew species with a beach view

In addition to the small mammals, I also had a camera out to capture some of the bigger species. I was happy to get another Common Duiker at this location. This is only the second one I've camera trapped in the Woody Cape reserve.

Common Duiker (Gewone Duiker - Sylvicapra grimmia) on the edge of the forest

I also like this photograph of the Marsh/Water Mongoose. The large anal pouch is clearly visible.

Marsh/Water Mongoose (Kommetjiegatmuishond - Atilax paludinosus) camera trapped at the Woody Cape

I've heard that the Afrikaans name "Kommetjiegatmuishond" refers to this anal gland, although I like to think it applies to the habitat in which the animal is often found as well. It is a fun name because it can be interpreted in more than one way and still accurately describe to the animal. There are so many animal names that make no sense at all that I prefer this colourful name over the boring "Watermuishond" alternative.

28 February 2015

Camera Trap Photo Tricks 101

I've been fairly busy wrapping up the development of the next WildLog version (should be out in March) and haven't had much spare time for blogging. I've been wanting to do some blog posts about the "post processing" I do on the camera trap photos I post on this blog. So I'll try to do 2-3 posts about it over the next few weeks, starting today :)

The sad truth is that even the best digital cameras can struggle to capture a natural scene in it's full glory and most commercial camera traps don't use anything close to the best (and most expensive) camera lenses / sensors.

My goal is to "restore" the photographs, to get them as close to the real life environment as possible. I try to get more natural colours, not "fake enhanced nature", but it can be tricky at times to find the balance. I don't use the rubber stamp, paint brush, smudge or any other fancy tool to "fake" or edit the images.

Below are some examples of what a few simple processing steps can do to improve your camera trap photographs. I've included a list of the steps taken in every example.

Long time readers might recognise some of the examples photos from earlier posts :)

Common Duiker (Gewone Duiker - Sylvicapra grimmia) at Koeberg Nature Reserve

Even though the After photograph looks much better than the Before, the colour of the animal is still peculiar. I try to only use tools that affect the entire image. Usually you have to find a balance between the real colours and the quirks of the camera hardware/software.

Over the years I've found that the "auto" tools in Photoshop do a decent job and I don't need any crazy technical knowledge or hours of time to get a decent result.

A few years back I was fortunate enough to get Photoshop Elements from the Adobe online store for a crazy good price (something like 75% off). I have found that the Photoshop Elements edition is much cheaper and more user friendly than the full product. The functionality it provides is more than enough for my needs. (For those on a budget, there are many decent free, or cheaper, alternatives out there.)

Small Grey Mongoose (Kleingrysmuishond - Galerella pulverulenta) at Berg River Dam

The auto colour and level correction tools are usually able to find a more natural colour balance, but the brightness and contrast tools can also make a big difference.

My usual approach is to darken the highlights slightly and (sometimes) lighten the shadows very slightly. Then play around with auto levels and colour until I get a decent result. The order in which you apply the steps can sometimes make a huge difference (and can be different every time).

Caracal (Rooikat - Caracal caracal) at Tygerberg Nature Reserve

Be careful not to overdo the effects, especially when playing around with the shadows/highlights. The presence of shadows and highlights add to the overall image and overdoing it can make the image look awkward and unnatural. I hope I strike a good balance myself!

The photograph of the Caracal above is a good example where the grass might look more "fake green" in the after photo, but the fresh spring grass at Tygerberg really do look very bright green in real life, not that strange yellow green in the original photo.

The "after" image in the below example takes the adjustments a bit further that I would usually do, but it illustrates just how much of the natural colour can be recovered through post processing.

Small Grey Mongoose at Tygerberg Nature Reserve

Unfortunately, no matter how hard you try some images just can't be saved. If there is no colour information present in the saved pixels to work with, then there is nothing any photo editing tool can do.

Usually you can still recover from severely under exposed photos, because there is a greater likelihood of some colour information still being present in the very dark shades, but recovering from over exposed photos are mush harder, since most of the pixels will be pure white.

Helmeted Guineafowl (Tarentaal - Numida meleagris) at Koeberg Nature Reserve

Interestingly enough the IR (InfraRed) flash cameras can produce some unexpected colours at night. I think it is due to the extent to which some materials reflect InfraRed light.

Above: Daytime photo from phone camera; Below: Nightime photo from IR camera trap

The change in perceived colour is most remarkable for the green and grey shirt at the top-right. The colours on the shoulders and the body almost seem to have swapped around! The dark navy blue shirt at the top-left also reflects very brightly in the infrared light and looks almost white.

I haven't noticed such a dramatic colour change in my real world camera trap photos, but I'm sure it happens to some extent.